The base was done. Here comes meaty part...
Shelving System
I shopped around shelving systems. Some of them are even flimsy, but still not cheap. Finding a right one requires careful attention. I knew what I wanted and didn't.
I want...
- Relatively sturdy (no need for heavy duty, either)
- Solid board shelves
- Adjustable system
- Metal tracks and brakets
- Relatively cheap
- Compact system
I don't want...
- Wire shelves
- Big triangle brackets to take up the space on the shelf below
- Fixed system
- Bulky system
- MDF board for shelves
My initial thought was getting one from Ikea. I had seen they had kits with great prices. When I checked their site, I realized they didn't have one I was thinking anymore, and couldn't find any models to suit my purpose. After spending a good amount of time Googling, I was not satisfied. So, I went to Home Depot. Rubbermaid's fancy system would be sure worth every penny, but I didn't intend to spend that much. I looked around and found a system from Everbilt.
First of all, the price was right to me. Second of all, the size was right. It's a compact system. Third of all, I liked the color. SOLD! ... not so fast. Even the shortest tracks were too long to the kneeling wall. The wall is 26" tall which includes the 5" baseboard. Tracks would suppose to be installed above the baseboard.
I asked the store person if the tracks could be cut. He said they wouldn't. So, I asked again differently if the tracks could be possibly cut technically. Then, he told me they could be cut with a hacksaw. YES, that was the answer I was looking for. We need to ask a right question to get a right answer. Thus Everbilt made my day.
I picked up some 12.6" x 2.3" Bronze Single Track Shelf Brackets. I knew I wanted 12" deep shelves. So, this was perfect. And, a couple of tracks. Chad cut them for me to fit the kneeling wall later.
I also picked up a 1/2" x 12" x 10' pine board for the shelves. I asked another store person to cut it in halves. He was a little bit grumpy and told me they had precut 5' one. Then, he looked at my cart. His face lit up. "Oh, now I know what you're doing. You need both pieces." He was grumpy because he thought I would take only a half piece and the other half would be wasted. I had known they have 5' ones, but it was cheaper to get 10' and have them cut in halves. It was a challenge to fit those in my tiny car, but I managed it. I was unstoppable! Well, they were sticking out from the car quite a lot. Good thing no police was on the way home.
Let Me Get This Straight!
Installing tracks is the most crucial part to set up a shelving system. They have got to be straight. They have got to be leveled. This is how I got it straight.

This doesn't look right, but it's actually leveled. There is nothing straight in an old house, LOL.

My trusty Level, I cannot live without you! With the great support from the level, all tracks were installed nice and straight.
Check for Fit
The two pine boards were placed. It's finally looking like shelving.
I was trying to see how things fit in the space and how shelves could be configured... two shelves or three shelves, two shelves on one side and three shelves on the other...
The right half is for sewing supplies. The left half is for personal care and house related supplies.

Go Small
The main organizers are photo boxes. I stocked them up when they were on sale. They could be different colors or designs for categories, but I like simple. It looks cleaner with less colors and textures especially in a small space like this. They would be labeled anyway, so no other systems are necessary.
Toothpaste, toothbrushes, floss, extension cords, light bulbs, batteries... They don't need big boxes. Photo boxes are just right size for them. If they are in a bigger container, they could get lost in it. They could be in another container in a big box, but that usually makes hard to access things. Accessibility is important. If things are not easy to be accessed, the system fails. Smaller a unit, easier to access.
Know What You Have
For some bigger items, I picked bigger plastic containers for bottled items such as shampoo, body soap and lotions, and bulky items like cotton balls, Q tips and wipes. Especially big ones, I intentionally picked transparent containers. You can see what's inside. I couldn't find transparent one with the sizes of grays. So, I went with something neutral, gray, over the other options of white and black.
Grouping by Sizes
11" squire boxes are for fabric. The fabrics are organized by sizes like less than 1/2 yard (These are more likely remnants from my old projects.), 1 yard, 1 1/2 yards, more than 2 yards. Ones reserved for specific projects got a dedicated box for their own. Zippers, trims and other supplies are organized with photo boxes.
Even Heights
After a little bit of shuffling around, this is how they settled. No homeless allowed here. Everything gets their own home, permanent home. When they don't have their permanent spots, things get messy and lost. You lose track of them.

The transparent plastic containers and the squire boxes for the fabrics are same height. Even two stacked up photo boxes are almost same height as the squire box. They don't only look cleaner, but help to configure the areas for better use of the space.
On the Side

The space next to the chimney is even tighter. Its width is 69 1/2". The bottom 2 shelves are 55" wide. Technically, I could set up another shelf on the top, but I didn't see any benefit with my case. So, I didn't. This is for the cleaning supplies. I was ambitious enough to put mops, a steam cleaner and vacuum cleaners, too.
Because of my habit to stock things up when they are on sale, I admit I have extra extra things. This is something I have been working on, not buying "extra extra". Since all supplies were in one spot, I see how much stuff I got.
Things are jammed in now, but the shelves should get more roomy as the "extra extra" things are consumed. Plus, since I started using the steam cleaner, I don't use chemical cleaners as much as I used to. In the future, most of the bottles will be gone from the shelves.

The steam cleaner and its attachments are all in the gray container. I can just grab the container when I need it.
All vacuum cleaner attachments are also in another container next to my mini Shark vacuum (It's too bad they don't make this model anymore. It cleans very well.). These are the things used to drive me crazy hanging around in the closet.
This is ok for now.
Clear the Floor
Mops and dusters don't need to lean on the wall standing on the floor. They need hooks to be hanged. I started looking for multiple hooks for mops like this:

It looks functional, but I realized this type of hook doesn't quite work with a steam mop and a spray mop like Swiffer. Yeah, those bottles... So, I shifted a direction and looked into a single hook... possibly a little more vintage look. Then, I got these from Amazon. Actually, I found them somewhere else, and found Amazon offered the lowest price.

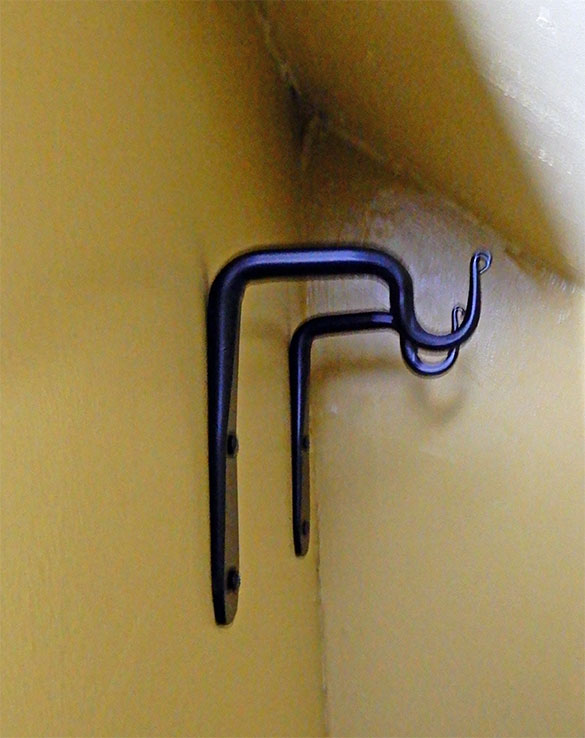
These are just perfect for them. I hope the distance from the wall would help to prevent their scratching the wall, too. For the duster and the dryer vent cleaner, I used small wroght iron hooks I got long time ago.

They are spread on two walls, so they don't look so busy on the walls. More importantly, they are easy to get to. The big vacuum looks jammed in because of the big hose, but it fits in. They are one happy(?) family now.
It's Not Done Yet!
✅Get rid of all wallpapers
✅Paint the walls
✅Set up shelvings on the kneeling wall and the indented part of the wall with the chimney
There are a couple more things need to be done here. So far, it's been all business. It needs some fun here.
Comments
Post a Comment